Wednesday, July 31, 2013

Recipe Wednesday July 31


It's summer, right?
 We're having a COOL summer here in Greenhills Ohio.
The thing I love most to eat in the summer is cole slaw! I loved it as a kid and I love it now.
The recipe is simple and very easy, taken from my mother's recipe and updated for my taste and likes.
So what is so special about my cole slaw? I made it!

Stephen's Different Every Time Cole Slaw

Sorry no red cabbage at the store today.

1/4 Head Green Cabbage thinly sliced
1/4 Head Green Cabbage coursely chopped
1/4 Head Red Cabbage thinly sliced
1 Tbs Apple Cider Vinegar
1/2 Tbs Celery Seeds


Mix all ingredients together in a bowl and place in fridge for at least one hour.

Adjust to your liking, It's a very forgiving dressing.
 Dressing
1/2 Cup Sour Cream
1/2 Cup Mayonnaise
2 tsp Mustard (your choice)
2 Tbs Celery Seeds
1 Tsp / packet Splenda
1 Tsp / packet other sweetener
3 shakes of Worcestershire sauce
Add a little at a time till you get as much dressing as you like
1/2 Cup Apple Cider Vinegar
Salt and Pepper to tast
 Place all ingredients in a large jar and shake until mixed,
Adjust if you like it more sweet or tart.  This is an easy recipe to change and make your own.

Remove what you will need from the Cole Slaw bowl and place it in another bowl.
Pour about a tablespoon dressing for each cup of slaw and mix with wooden spoon.
Adjust slaw or dressing to your taste.
ENJOY!!

We have this with everything from grilled anything, to mac and cheese.  Super for Picnics, BBQ, or Pot Luck.  It's very easy to take along, but remember it has Mayo so you want to keep it cold at all times.
My sample. MMMMMmmmmmm


We like it the next day on roast beef grilled cheese sandwiches, or as a topping on any sandwich.

Additions to Slaw:
Grated Carrots,
Thinly sliced Radishes
Diced Bell Peppers
any vegetable could do.

Substitute:
Yogurt for any of the Mayo / Sour Cream.
Different types of Cabbage.
Horseradish sauce for bite,
use other spices and herbs for a more adult style Slaw.


Sorry... I ate it all.  Time to make another serving!

Playday Tuesday July 30

Dog Park Etiquette
What dog doesn't love a dog parks!
  
Back in California, our community had a wonderful, large dog park.  Our dog park had three areas: one large area for dogs to run and be off leash, another spot for puppies, small and toy dogs to enjoy, and a small area in the back of the larger area for big dogs to have alone time or dog who were not as social yet. 


Water was available, as were pipes for the dogs to run through, and tree stumps to jump on.  Plus, there were benches and tables available for the humans to enjoy


Maisie, our first dog, was great, gentle and friendly with all the dogs and made lots of friends. 
When Rosie was old enough we took her to the park and she made lots of friends too.  We kept Rosie in the little dog or puppy park, while Maisie ran around the big side.  Maisie would check on Rosie once in awhile through the fence.
Our etiquette problems started when we introduced Rosie to the big side with Maisie. 
Soon Maisie was at Rosie's side and playing the big sister or big nasty sister.  Maisie would try to herd the other dogs away from Rosie, and bark at them too. It's her nature, as she is a working breed.
This did not sit well with us, and we scolded Maisie, put her in time out, and used treats to teach her not to herd or bark. But her instinct to herd got the best of her, so we relegated ourselves to the enclosed small area of the big park, where they could play with each other and not bother the other dogs.  


When we moved to Ohio we made sure our dogs had their own yar, with lots of room for running and  playing.

Since we moved, we have found the  dog parks in Ohio that are  like doggy day resorts. Pools to splash in, wade in and misters; fields and obstacle courses, and even training areas with teachers. A far cry from our  community dog park back in California. 

We found most of our experience to be all good, but on a few occasions we had some parents who just did not know how to handle their "kids".  

I wish this poster was up for some of the parents at our dog park to read. 
Dog Parks are play parks for all dog types, so be nice and folks will be nice to you. 

The poster is from the blog/Website of Dr. Sophia Yin. (drsophiayin.com) Take a look! She offers this poster as a PDF download.

Happy Play Time!

Monday, July 29, 2013

Remember Monday July 29

Remember Monday : Your Lawn
 
 
Here in Nature's 1/3 Acre, our dogs Maisie, Rosie and Coco have a lot of room to run and play.  But lately here in Ohio we have had  lots of rain. (Coming from California, I am not used to rain in the summer, or much at all.) And for us, rain means FLOODING.  We are located below a main street in our half of the village so all the water from above runs off into our backyard. The backyard does drain, but our clay soil holds the water so my lawn looks like a marsh. We have lots of names for our lawn: The Lake, The Marsh, and so on. So this year, I have been looking at what happens to the grass and what is the best way to handle it.  I am sharing this article today so you remember your lawn is a very important part of your enjoyment--and your dogs. Take a look.

Heavy rains and flooding have left many lawns waterlogged, or worse, covered in silt when flood water recedes. Nature has a wonderful way of recovering from these things, but a few points considered now could give it a helping hand.
Try to avoid walking on wet or damp grass, as it is likely to damage it. If a lawn has been waterlogged for several days, wait until water levels have completely subsided and you can walk on it without leaving wet footprints.
If you want to mow the lawn once it has dried out – just to give it a late season trim, set the mower blades to the highest possible cutting height. Do not attempt to mow a wet or saturated lawn as you risk compaction and ruts. And obviously do not use an electric lawn mower in damp or wet conditions.
If the lawn has been flooded, be aware that any silt left behind may be contaminated, so wear rubber boots, disposable rubber gloves and cover any open wounds before working outside. You should attempt to remove silt, along with any debris from the lawn – either by hosing or raking it off. Unfortunately, if your lawn has been submerged for over a week or if it is covered with more than ¾ inches of silt there is a possibility that it will need to be re-laid, but this along with any major lawn repairs will need to wait until early spring.
Lawns that have been very wet will benefit from some serious aeration – either manually using a garden fork or with the help of a powered aerator. Moss is also likely to build up in damp conditions, but remedial treatments like aeration, scarifying, top-dressing or re-seeding bald patches will now need to wait until next spring.
One thing you can do now is check for any particularly waterlogged or vulnerable areas of the lawn, where heavy rain collects. Make a note of those areas and consider preventative action you could take in the future, either by evening out the ground levels or improving drainage.
Article from: Stihlusa.com

Thursday, July 25, 2013

Photo Log Thursday - July 25


Baking Baking and more Baking

Well, another week over and we did lots of things.

Gardening was kept up.  we 're getting lots of tomatoes, corn and blackberries.  We even had our first cucumber.  The cantaloupe and watermelon are doing nothing so far but growing very, very long vines.  Melons sono?  As for the broccoli and the spinach, we cant seem to get a break and their leaves seem to be eaten, but by whom?


Tomatoes on the vine

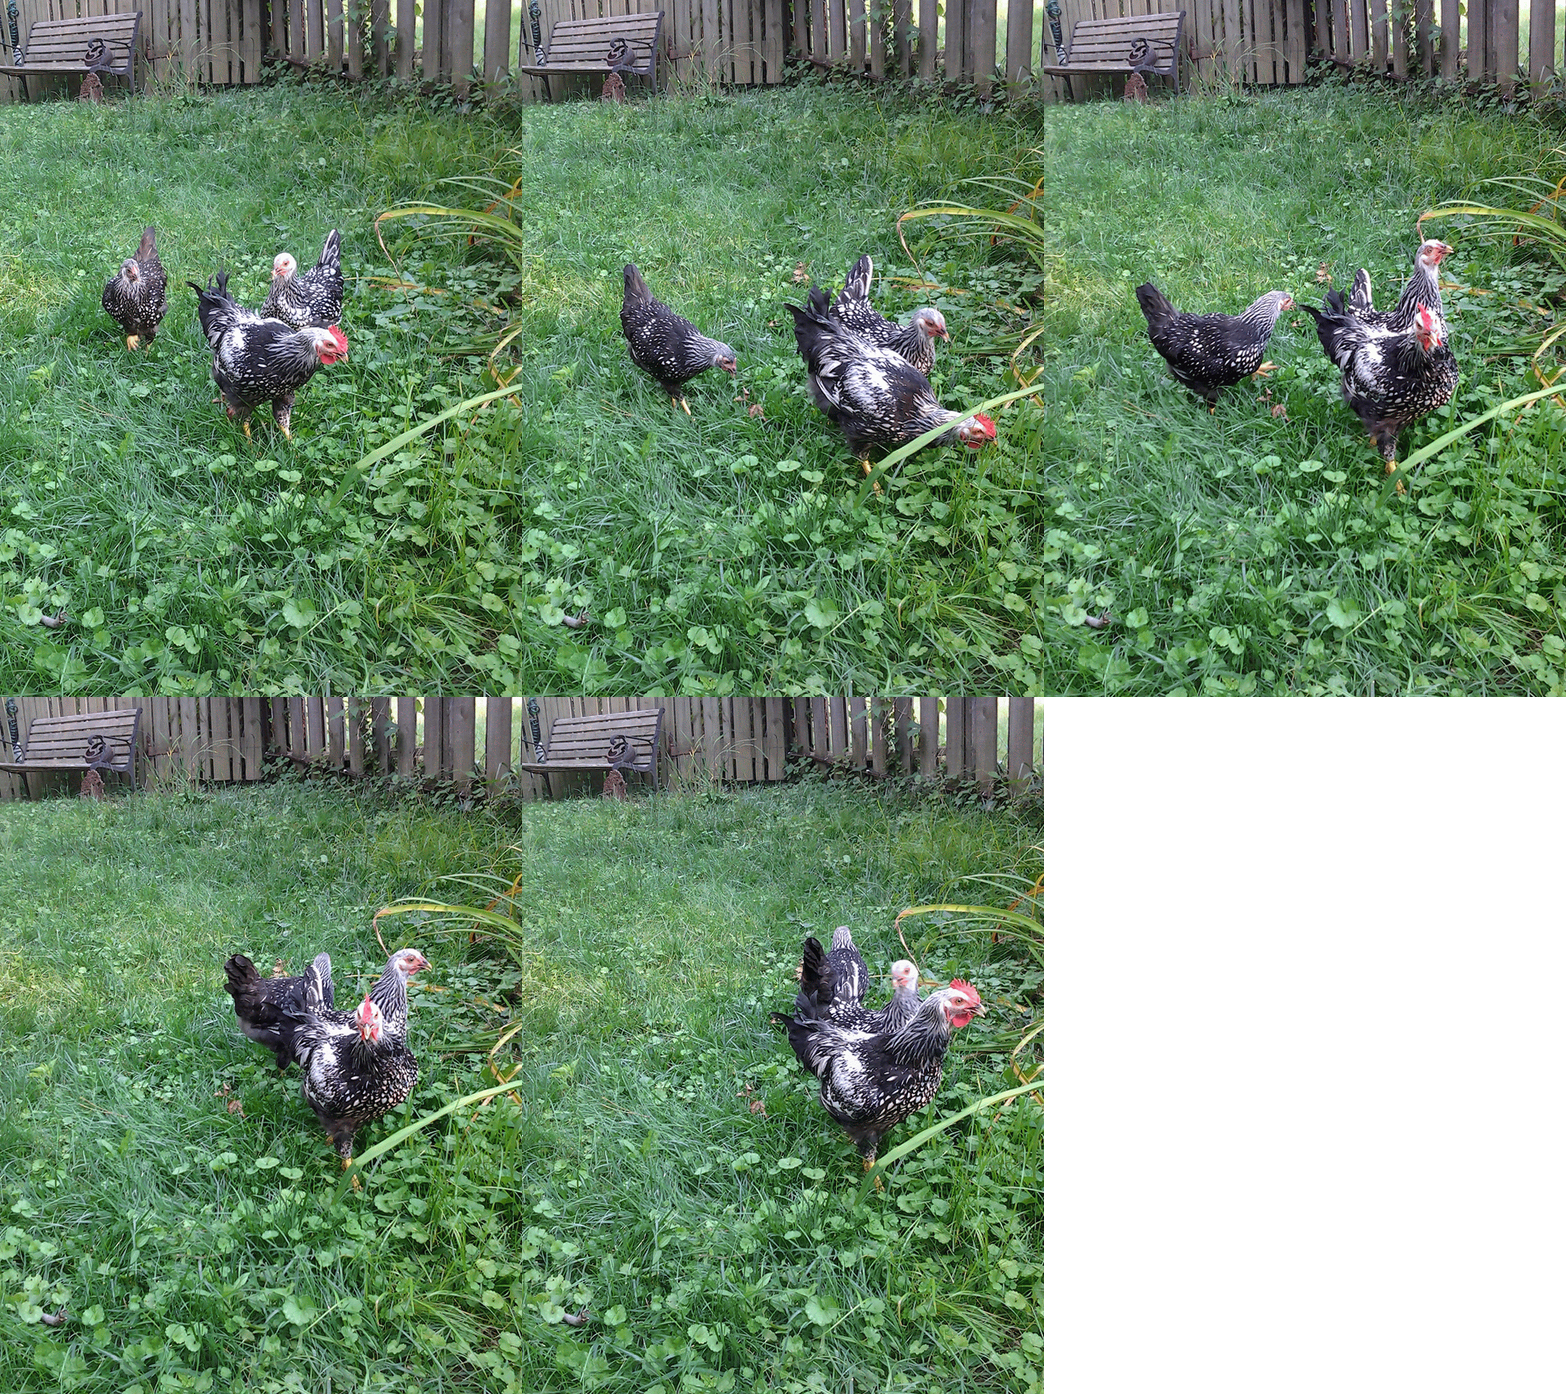
The chickens are getting used to each other but still stay in their little groups.  We have a rooster in the new group and I am trying to find him a home before he becomes Sunday Dinner. (Anybody know a good farm who needs a rooster, FREE?)


The New Girls (and Guy)
The "Bouncers"

We made denim toys (see Friday's blog), and Coco loves hers!


Coco with her New Toy

We celebrated National Hot Dog Day.  It seems I celebrated one day early, with grilled hot dogs, chili, and all the condiments that dress up hot dogs. Mmmm...  I am hungry now.


For me, everyday is National Hot Dog Day.

With a break in the HOT weather we grilled over the weekend.  Robert makes the best flank steak, marinated in fresh herbs, soy sauce and a bunch of his secret stuff.  Very very Yummy.  We also grilled asparagus with a little olive oil, salt and pepper.  We use a fish basket to hold the asparagus; it works very well. Thanks to our friend is California for the great gift! We can't forget dessert: home made vanilla ice cream, with a blackberry wine sauce. Again YUMMY.


Can you say YUMMY?

Wednesday was another Concert on the Commons in our little village.  We debuted our new tent. It's the same size but seems much more roomy. I think it even brought more folks to our booth.

Back side of the NEW Tent


A couple of weeks ago, our Mr. Coffee stopped working and we decided to not just buy "another" Mr. Coffee but save and get a REAL, good coffee maker, one that would not break down after the one-year warranty was up.  For now we use a 1960s Corningware percolater.


So far this week.  Have a cup of coffee and enjoy your weekend.

Tuesday, July 23, 2013

Play Day Tuesday July 23 - DIY Denim Toy

Well, how did you do on your denim play toys?  
We made a few ourselves and let the dogs try them out. Take a look.
 
Four strips of denim about two inches wide and a foot or so long.
Since I am more a visual person, the directions helped but confused me a bit until, as Creativity Unmasked said, "You will understand better with your strips in front of you plus trial and error." I must say there was not much error here; this was a very simple toy to make.

I set up my strips like this, then folded them over each other.
After trying it like the photos. I came up with this method that worked for me and my brain.

Next I turned it over and tucked each tail of the strip into the loop it covers. 

One by one I pulled the tails tight to get this wonderful knot.

Having extra long tails, I decided to tie the tails with tail next to it to make one big knot.

Finished Product. I am happy.
With our denim toys all finished, we went outside to play. Coco was really ready to play with them, jumping and dancing around me till we got to the end of the patio path.
I threw one of the toys into the air and she would run and catch it.  Then Coco would run up to me and then run away. Run up to me and run away.  I had to grab it from her so we could play again.
 
 
Here are some photos of Coco with her denim toy. She carried it all around the yard with her. When I tried to take it from her she would turn her head and look at me like "Um, you made this for me, so back off"

 
A rare moment came when Coco let go of her toy. I swooped in and tossed it high in the air again.  
 
Now I want to see if I can add a tennis ball to the inside and make it look like a denim comet. 
Coco has had the toy all day and has not given it up yet. 
 
Hope you folks had as much fun as we did.  
Play well, Play safe, and JUST PLAY!

Thanks to Creativity Unmasked for this wonderful DIY dog toy idea. 
Visit their blog soon.

Friday, July 19, 2013

July 19 DIY Fridays

Make a Denim Dog Toy.
If your dog goes through chew toys like ours do, this is a simple way to put your old jeans to a new use.
As soon as this is posted I will be making these fun toys!
This comes from the Creativity Unmasked blog.

DIY No-Sew Denim Dog Toy

If you have a tired pair of denim jeans and not-so-tired dog, then this simple no-sew DIY dog toy is the perfect fit...even if the jeans aren't! All you need are some recycle-ready jeans, a pair of scissors, and a few minutes to make this quick toy. Our spoiled (but very loved!) dog Oli now has his very own denim toy collection thanks to an old pair of my jeans!


Cut two extra long (leg length) strips of denim from a leg of your recyclable jeans. My strips were approximately 4cm wide and I purposefully chose to include the rugged seams for extra fun toy texture and durability.  Lay the two strips in a cross (one strip horizontal and one vertical, crossed in the missed) and then "box weave" or "box braid" as follows.  WARNING: Reading the following may mess with your mind unless you have strands.  It is hard to visualise, but oh-so-easy one you understand through a little trial and error. 
    • Flip the left cross of the horizontal strand over the vertical strip to create loop one.
    • Flip the top cross of the vertical strand over the upper fold of the horizontal strip to create loop two. Confused?  See the upper right of the collage below for a messy but functional visual.
    • Flip the original right cross of the horizontal strand back across both verticals to create loop three.  
    • At this stage, you may have to tidy up your strands so that the strand that you just positioned is on the bottom of the "square" that you are building to make sure that you don't get lost for the final loop!
    • Double the original bottom cross of the vertical strand over the horizontal strand that you just tidied into bottom position (forming loop four) and then pull up through loop one.  
    • The stands should now look like a woven square (lower left of the collage below).  Don't worry, Fido and Fluffy won't judge if you didn't get it right.  
    • Carefully and evenly pull tight. It will now look like a messy knot... not to worry!  That first one was just for practice!
    • Flip over and repeat, watching your denim "ball" slowly take shape.  If you wish, take extra care on the final layers to twist the denim for an attractive finish.  Be sure to leave a few tempting ends for your pampered pup to carry and grip.
    • Didn't turn out quite as pretty as you had hoped? No worries! Just grab your scissors and try again.  After all, two dog toys are double the fun of one!


    Find more fur-friendly DIYs in my recent Six for Saturday (or Sunday) post and my growing Pet Craft board on my Pinterest.  If you stumbled across this while hunting for denim DIYs, then (after exploring a little of course - welcome to Creativity Unmasked!) try my Jean-ious Pinterest board instead.  Happy creating!

    Note: Always make sure you know your dog before giving him or her any new toy.  Some dogs would rather eat their toys than rip them apart for joy, making many of the fun toys made (whether handcrafted or storbought) from fabric, robe, etc a risky choice for Rover.

    creativityunmasked.blogspot.com

    Thursday, July 18, 2013

    Photo Log Thursday - Chickens

     
    Check out the New Girls in the coop


    This was the first go at the New Girls free ranging in the back yard. 


     The weather was rather hot and with high humidity all the dog seem to melt
     
    Blackberries in the garden are coming along nicely, let's hope the birds don't eat them all.  


    We made a new table banner.  Coco is always ready to play ball
    The older girls checking out the patio


    The END 
    So that was our week in photos.
    Let's hope I can remember to take my camera with me on more occasions. 


    July 17 2013 Recipe Wednesday

    July 17 Recipe Wednesday

     
    Where do recipes come from?  Who makes them up? Why do we collect them? 

    We'll  have some fun trying to answer these questions.

    Today we will start with our first Dog Treat Recipe. 
    This recipe was given to me by a friend in California as a gift for our dogs at Christmas.

    Very simple to make but not nothing very interesting about it. 

    Basic Dog Treat
    Ingredients
    3 Cups all-purpose flour
    1/2 Cup nonfat dry milk
    1/2 Tsp. baking powder
    1/2 Tsp salt
    13 Cup Low-sodium beef or chicken bouillon powder
    2 Large eggs
    1 Cup warm water

    Directions
    1- Preheat oven to 350 degrees
    2- Mix all dry ingredients in a large bowl.  Slowly add the warm water and eggs and mix well.  
    The dough  will be stiff
    3- Use hands to knead the dough until it is smooth and easy to handle, and then form into a ball.
    4- Place the ball on a floured breadboard.  Roll the dough out to 1/4 to 3/8 inches thick.
    5- Use a 3 inch dog bone cookie cutter or cut the dough into 3 x 2 rectangles
    6- Place the bones on greased cookie sheets.
    7- Bake for 15 to 20 minutes or until golden brown.
    8- Take the cookie sheet out of the oven, and using a spatula, flip the bones over.  Return to the oven for 5 minutes or until the bones are golden brown on both sides.
    9- Remove from the oven, let cool thoroughly, and store in an airtight container

    It was all good and well for the dogs but they got bored after a few weeks and would sniff them and walk away. So it was time to start looking for other recipes.
    Whenever we were out and about I would look for a Dog Treat Cookbooks.
    We knew of 3 Dog Bakery and visited them a few times on our outings. Our dogs loved the the fancy treats we would bring home. The 3 Dog Bakery book were the first doggy cookbook I purchased from our local shelter.
    Loved the recipes, but they seemed too exotic for our girls: fruit cocktail, coconut and honey (to me at the time, they were weird ingredients).  Some of the ingredients were hard to find or expensive.  (I started to make dog treats due to the store-bought treats' cost, and what was in them that I could not pronounce.) So my search for more books continued.  After adding two more books to my collection, I had some idea of  what the basic recipes were and how to manipulate them.  (More flour if you add more liquid, like honey or molasses.)

    So we added peanut butter to the above recipe and deleted the bouillon, added wheat flour and chicken stock as the liquid. Soon our dogs were snacking on things like
     Italian Twist: treats made with tomato soup, cheese and parsley.


    Cocoa Kittys, made with carob powder and dried mint.

    Peanut Butter treats, of course.
    Sorry, no photo. There are never any left to take a photo of.)

    So that is how we started creating our own dog treats.
    One simple recipe from a company that sold dog bone shaped cookie cutters as a Christmas gift.
    I will always cherish this recipe not only because it was given by a wonderful friend but
    for what  it began. Our wonderful journey known as MaiRo & Co - Dog Treat Bakery.

    Till next week.
    Woof!


    Tuesday, July 16, 2013

    Playday July 16 2013

    Play Day Tuesday

    What dogs doesn't just love to play and play? They can play catch, fetch, run around and chase each other, jump on things and off things, wrestle with each other or just toss the rope in the air and catch it by themselves.

    Our dogs have always been the running around type. If we play catch, I get the work out.  I throw the ball, they run past the ball and I go get the ball so they can RUN again.


     Maisie just loves to run and run and run. She plays with Rosie and Coco by chasing them  around the yard.  "Mu" is our oldest and so her play time is a little shorter now.


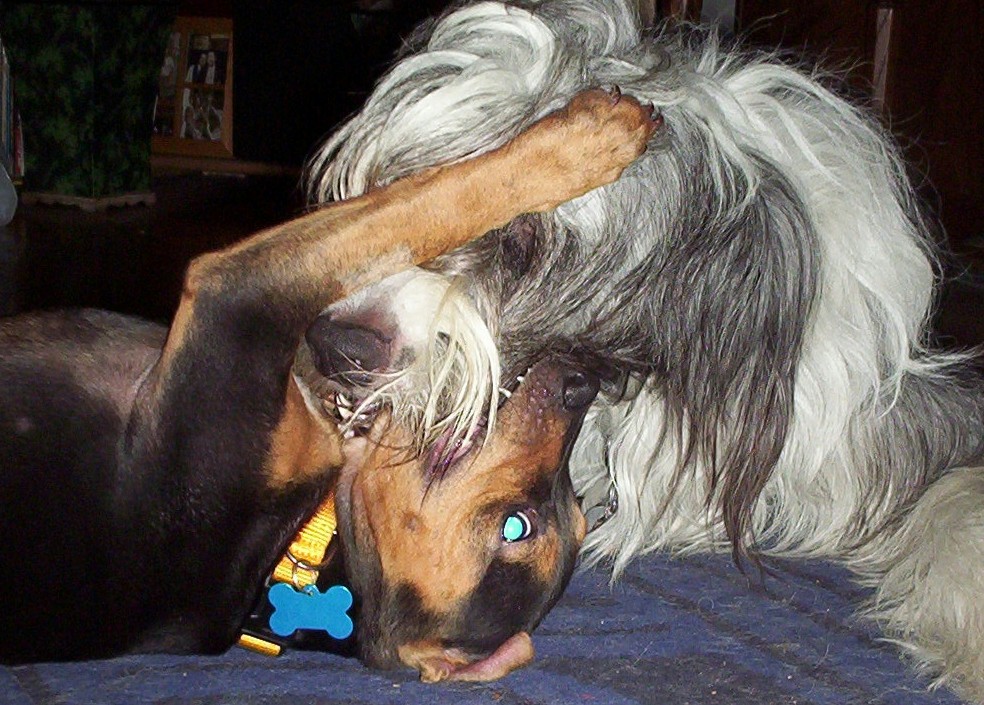
    Rosie loves to play Tug-O-War with rope. She will dangle a rope in front of Maisie and wait for her to take it, then pull and growl. This can go on for a very long time! Another game Rosie likes is to lay on her back and try to eat the other dog's head--so funny!  She is also very sly. If she wants what Coco has, Rosie will ring their bell to go outside, then do a fake-out when Coco drops her toy to go outside by running back to grab Coco's toy, leaving Coco with nothing. Miss Rosie has them BOTH now.


    Rosie chasing Maisie

    Coco with Rope
    Coco loves to chase any type of ball. And she will actually bring the ball back to you so she can retrieve it again.  She is good about carrying the ball around, so when you want to play she is ready.   She will also headbutt Maisie to get her to chase her around the yard. When I give Rosie some loving, Coco will come by and force her way between us and try to eat Rosie's head. When the growling and bouncing begins I have to get out of the way or I end up under them both as the try to eat my face.

    
    With Ball
    Coco has many toys: ball, robe, football, and kong.

    Coco & Mu at play
    Which way did he go?
    Oh, and Rosie would chase squirrels around the yard all day long, if they would only stay around.


    So that is Play Day with our little family.  How does your family play?

    Powered By Blogger